Package management with Dub
dub is D’s package manager. The dub binary as well as many of third-party packages that use the dub package management are available on code.dlang.org.
Installing Dub
brew install dub
==> Downloading https://homebrew.bintray.com/bottles/dub-0.9.24.yosemite.bottle.tar.gz
######################################################################## 100.0%
==> Pouring dub-0.9.24.yosemite.bottle.tar.gz
🍺  /usr/local/Cellar/dub/0.9.24: 5 files, 9.5M
Auto completion with DCD
Installing DCD
DCD is the D completion daemon. DCD can be installed on the Mac using homebrew.
brew install dcd
==> Downloading https://homebrew.bintray.com/bottles/dcd-0.7.5.yosemite.bottle.tar.gz
Already downloaded: /Library/Caches/Homebrew/dcd-0.7.5.yosemite.bottle.tar.gz
==> Pouring dcd-0.7.5.yosemite.bottle.tar.gz
🍺  /usr/local/Cellar/dcd/0.7.5: 5 files, 11.5M...
Make a note of the dcd-server path, you will need it to configure DKit.
which dcd-server
/usr/local/bin/dcd-server
Standard library
We will need the sources for druntime and d standard libarry (phobos) to help DCD.
The location of this can be found by running dmd without arguments and looking for the “Config file: ” value.
The config file, (/usr/local/etc/dmd.conf) tells me it is /usr/local/Cellar/dmd/2.069.0/include/d2 (the path after the -I flag).
DKit, the sublime text plugin for D
Dkit combines the power of DCD (for auto completion), Dub (for package management and build management) into one sublime text plugin.
Install DKit
Clone DKit to sublimetext’s packages directory. On Mac OSX it is ~/Library/Application Support/Sublime Text 3/Packages. You can find out the corresponding directory for your operating system by going to Preferences -> Browse Packages menu.
cd ~/Library/Application Support/Sublime Text 3/Packages
git clone [email protected]:yazd/DKit.git
Configuring DKit
We will be modifying Dkit’s default settings to match our system. To do so, first view the default settings by visiting Preferences -> Package Settings -> DKit -> Settings - Default menu. Copy the contents to
Preferences -> Package Settings -> DKit -> Settings - User.
{
"dcd_path": "/usr/local/bin/dcd-server",
"dcd_port": 9166,
"include_paths": [
"/usr/local/Cellar/dmd/2.069.0/include/d2"
]
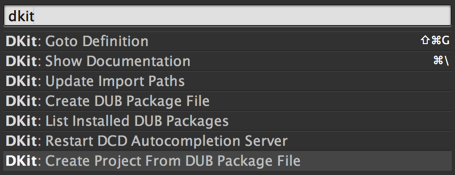
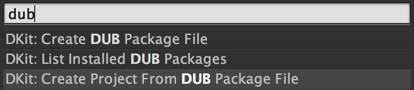
}DKit fundamentals
Press super+shift+p to bring up the context menu. Type “dkit” to start searching for commands that relate to the DKit extension.
Keyboard shortcuts
Goto definition of a keyword — super+shift+g
Show documentation of a keyword — super+\
Project/package Management
Creating a new package

{
  "name": "project-name",
  "description": "An example project skeleton",
  "homepage": "http://example.org",
  "copyright": "Copyright (c) 2014, Your Name",
  "authors": [],
  "dependencies": {},
  "targetType": "executable"
}
Edit the dub.json to add the sourcePaths option.
"sourcePaths": ["."],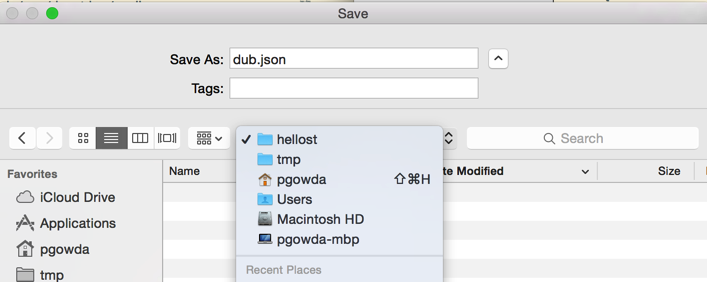
Building projects
Assuming you have a project structure like this:
tree .
.
├── app.d
├── dub.json
├── dub.selections.json
└── hellost.sublime-project

0 directories, 4 files
You would like to build the project using Sublime Text’s default super+shift+b build command to bring up build options.
Do do this, let’s create a new build system that supports three actions:
- Run
- Unittest
- Build
Open Tools -> Build System -> New build system and paste the following text into the buffer
{
"cmd": ["dmd", "-g", "-debug", "$file"],
"file_regex": "^(.*?)\\(([0-9]+),?([0-9]+)?\\): (.*)",
"selector": "source.d",
"path": "/usr/bin:/usr/local/bin",
"variants": [
{
"name": "Run",
"cmd": ["rdmd", "-g", "-debug", "$file"]
},
{
"name": "unittest",
"cmd": ["rdmd", "-g", "-debug", "-unittest", "$file"]
},
{
"name": "dub",
"working_dir": "$project_path",
"cmd": ["dub"]
}
]
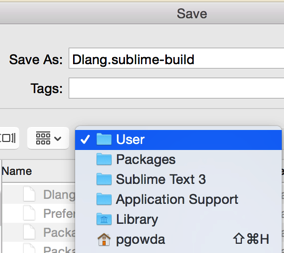
}Save the file into the default location prompted by Sublime Text (eg: ~/Library/Application Support/Sublime Text 3/Packages/User on Mac).
Make sure you select your recently created build configuration as the
default for your project from the Tools -> Build Systems -> Dlang.
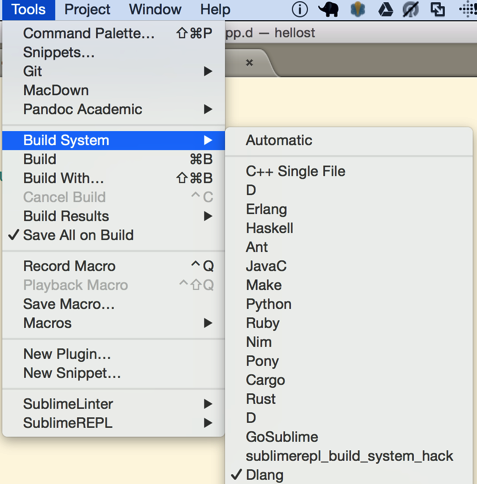
Now press super+shift+b to bring up the build menu.
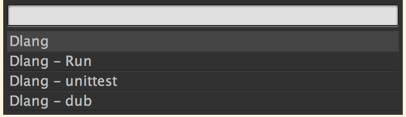
Select “Dlang - dub” to build your project with dub.
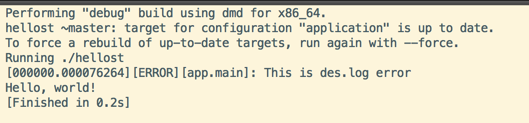
You should see the compile and run messages in the console.
Code linting with dscanner
Install dependencies
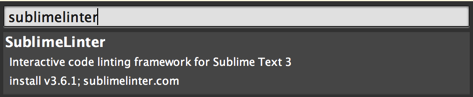
Install sublimelinter using package control.
Install Sublimelinter-dscanner
cd ~/Library/Application Support/Sublime Text 3/Packages
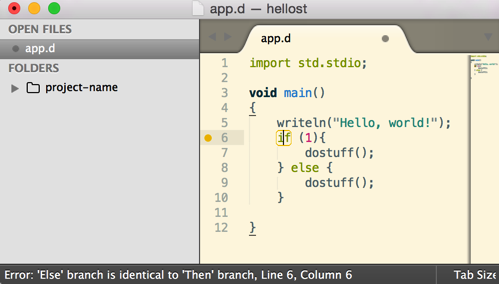
git clone https://github.com/economicmodeling/SublimeLinter-dscanner.gitUsing DScanner
Restart sublime text.
Hover over yello and red dot annotated lines to see DScanner’s error messages / warnings.
Code formatting
Editorconfig
This is my ~/.editorconfig:
[*]
trim_trailing_whitespace = true
end_of_line = lf
insert_final_newline = true

[*.d]
dfmt_align_switch_statements = true
dfmt_brace_style = allman
dfmt_outdent_attributes = true
dfmt_outdent_labels = true
dfmt_soft_max_line_length = 80
dfmt_space_after_cast = true
dfmt_space_after_keywords = true
dfmt_split_operator_at_line_end = false
end_of_line = lf
indent_size = 4
indent_style = space
insert_final_newline = true
max_line_length = 120
tab_width = 8
dfmt
Install “dformat for sublime” using git
cd ~/Library/Application Support/Sublime Text 3/Packages
git clone https://github.com/dmi7ry/dfmt-sublime.git
Edit dformat.sublime-settings to suite your location of .editorconfig. On my Mac, it is ~/.editorconfig.
{
    "config_path": "/Users/pgowda/.editorconfig"
}
Use the context menu to “Dformat” the code

Keyboard shortcuts
DFormat — super+. followed by super+f.
Todo
- Project specific settings for
include_paths - d-scanner
- d-linter
- SublimeGDB
See also: Using Xamarin Studio for D programming